

Learning how the chess pieces move is the first and most important lesson you need to know if you wish to play the game well. There are 6 different types of pieces on the chess board: The king, queen, rook, bishop, knight and pawn. Out of all the chess pieces, the rook seems to spark the most interest among many beginner players.
In this article, we will discuss how the rook moves, the number of squares it can move to, and some tips on how to make the most use of this major piece.
The rook is actually one of the easiest pieces to master, so be sure to follow along.
How Many Squares Can A Rook Move?
The rook is the second most powerful chess piece. It moves up, down and sideways any number of squares on the chess board. In total, the rook controls 14 squares from anywhere on the chess board (center, edge or from the corner). The queen is the only piece that controls more squares than the rook, 27 squares in total.
The rook can move any number of squares vertically or horizontally

Number Of Squares A Rook Can Move In The Starting Position
At the beginning of a chess game, your 2 rooks are placed in the corners of the chess board. Particularly the a1 and h1 squares for white or the a8 and h8 squares for black.
The rooks have no squares to move to in the starting position because they are locked in by their own pawns. In order to get your rooks participating in the game, you must open up files for them. Files are the vertical rows on the chess board lettered a through h.
Rooks in the corner

Rooks perform best when they are placed on open files or semi-open files. But to get them on these files, one of the first things you need to do is castle your king.
Castling is a special move in chess which involves both the king and the rook. The king steps 2 squares towards the rook in the corner, then the rook jumps over and lands beside the king. All this takes place in one move with the aim of safeguarding the king while activating the rook in the corner.
Before castling
After castling

The rook lands on the f1 square for white after kingside castling. The rook has been brought from a passive square to a more active square. The final step to activating the rook is to bring it to an open file or semi open file.
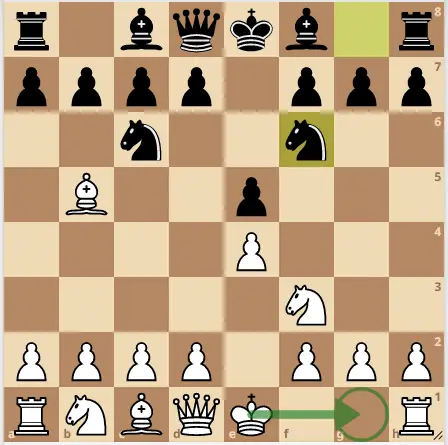
To open files for your rooks, you should push your central pawns forward and exchange them off in the center of the board. For example, in the position below, white can exchange his pawn on d5 which would create an open e-file for the white rook to occupy.
White can open up the e-file for his rook by exchanging the pawn in the center
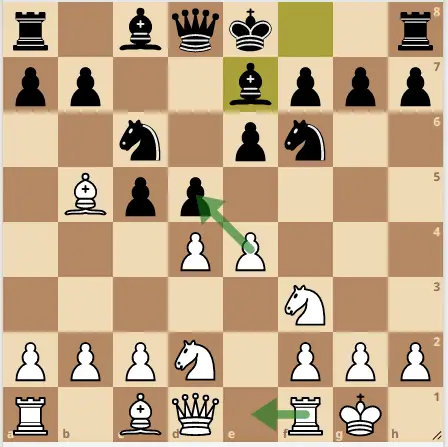
The rook gets to the e-file where it controls more squares down the board

In short, you should activate your rooks by castling your king, exchanging your pawns in the center and then bring your rook to the open file. By implementing this strategy, your rook will be able to control more squares on the chess board thereby increasing its activity.
The Most Active Squares For Your Rooks
Rooks are very active on open files because they move up and down the chess board. However, rooks are even more active once they get to the 7th rank of the chess board (2nd rank for black).
A rook on the 7th rank not only controls the file it sits on, but it controls the rank that the enemy pawns usually sit. It can gobble up the enemy pawns on the 7th rank and pose serious threats to the opposing side.
Two rooks on the 7th rank are even more destructive. They can pose serious danger not just to the pawns on the 7th rank, but also to the enemy king.
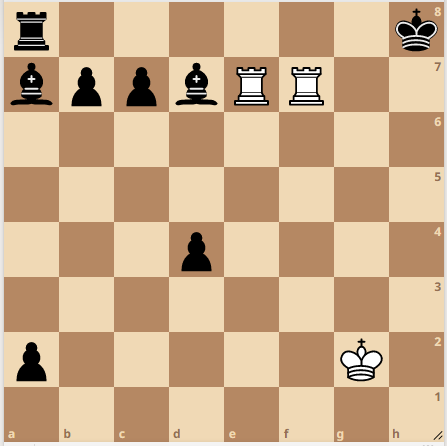
In the position below, the 2 white rooks occupy the 7th rank. Black won’t only lose material, but his king is in serious danger of getting checkmate.
Rooks on the 7th rank are destructive
The game below shows how destructive 2 rooks on the 7th rank are. Even though black is ahead in material, white can threaten mating ideas with his 2 rooks along the 7th rank, granting him a nasty tactical combination in windmill style.
In what seemed to be a hopeless position for white, the two rooks gobbled up all of black’s pieces on the 7th rank and is just in time to stop black’s a-pawn from promoting. The combination of these 2 rooks is why they are also known as pigs on the 7th rank, because they have the power to gobble up all the opponent’s pieces like a pig.
The duo can also be referred to as rescue pieces because they can save a completely lost position and turn it into a win or draw. Therefore, if you find yourself on the losing end, try bringing both your rooks on the 7th rank for white or the 2nd rank for black.
Do The Number Of Squares Matter For Your Rooks?
The number of squares a rook can access over the board does in fact matters. If you don’t open files for your rooks, they won’t control enough squares on the chess board and that can lead to them being passive. As a result, it is necessary that you create these open files for your rooks.
Rooks that are locked behind their own pawns won’t serve any function in the game. Remember, rooks are the second most powerful piece on the chess board, therefore it is necessary that you take the chance to activate them in order to get the most out of your game.
Final Verdict
A rook has a value of 5 points which is the second most poweful piece behind the queen (9 points). They are referred to as your major pieces. They play an integral role in forming attacks against the opposing side and to take control of files and ranks.
The more squares your rooks control over the chess board is the more active they become. Therefore, you should strive to open files, particularly in the center of the board where most of the action is.
